If you have a 2004 (except Heritage) – 2008 Ford F150 or similar truck with power windows that work sporadically or not at all, then thispost is for you! A new master switch for the F150 isn’t really all that expensive ($40 or so for a Dorman), but I’m always up for saving a few bones if I can! Plus, if you clean the contacts yourself you can save yourself a trip to the parts store or a few days waiting on the part to arrive from your favorite online parts source. The whole process takes about 15 minutes or so and can be accomplished using just a couple of basic tools. The principles are the same for most window and door lock switches, but be careful as they may not all come apart as easily as the F150 in this example.
Tools Needed:
Pocket Screwdriver or similar tool
Sandpaper (optional)
Q-tips or similar (optional)
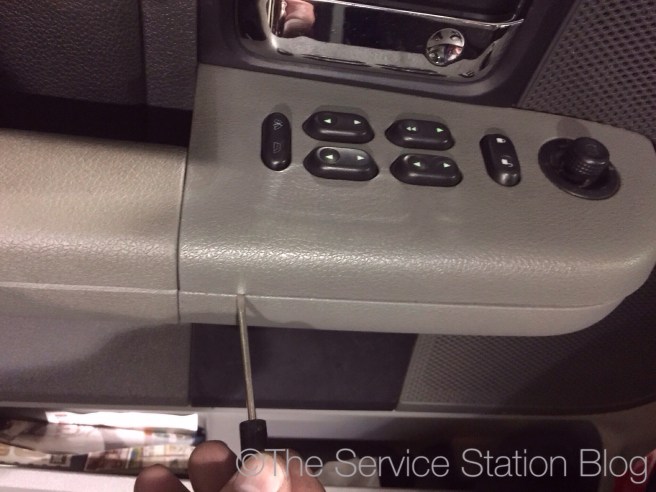
First, remove the switch by using a fancy plastic pry tool or a small screwdriver (just be careful not to scratch the plastic, especially if it’s your wife’s truck!)
Next it’s time to take the switch out and pop off the buttons. Disconnect the wiring harness from the switch, then use a small screwdriver to carefully pop off the buttons. Just take your time and don’t force anything to bend further than it wants to. Cars have feelings too and they don’t take well to stress!


With the buttons off (you kept them in order, didn’t you?) gently pry on the tabs to take the switch apart. Be extra careful as those little tabs can break off quicker than a Hollywood engagement.


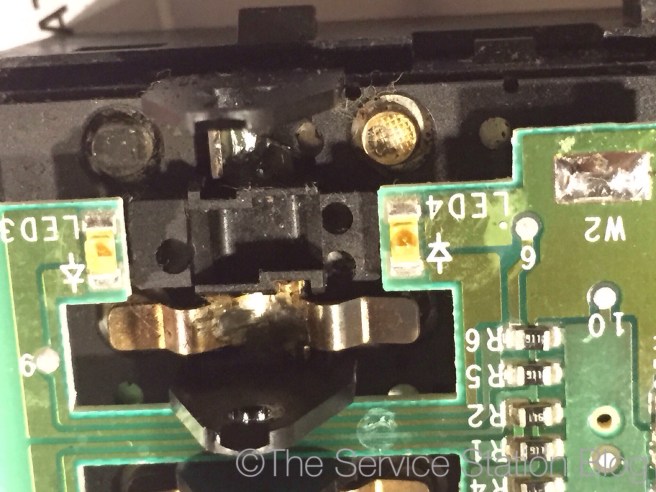
Once the circuit board is exposed, you can remove the switches by prying on the ears as shown. Again, use caution; now isn’t the time to demonstrate your herculean strength to your significant other. Be careful here because there are some springs and plungers that would love nothing more than to fly off and run away forever under your workbench or down a drain.


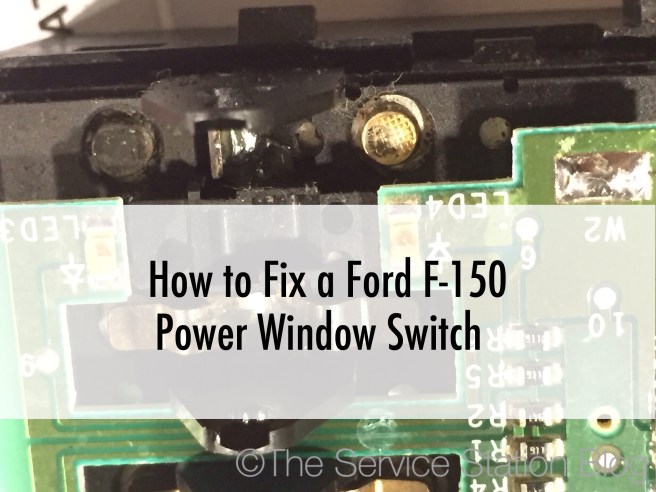
You’re almost there! Take (you guessed it) your pocket screwdriver and lift out the brass rocker. This little guy is one side of what you’ll be cleaning up.

Here’s a closeup of the contacts and a rocker side by side. Use some electrical contact cleaner, sandpaper, or even a pick or screwdriver to scrape the carbon and other crud off the contacts. It wouldn’t be a bad idea to use a small dab of dielectric grease to keep these guys from corroding too quickly.
The process for the single switches are pretty much identical except it’s a little more difficult to remove the single switches from the interior piece to which they mount.


Put it all back together and give them all a quick test before you head to the drive thru for celebratory milk shakes!
