We all love a good rocking chair right? Sitting on the porch on a warm summer evening sipping iced tea, gossiping about all the neighbors as they stroll by; what better way to pass the time? The problem arises when you’re in your favorite Honda and you get that same sensation of rocking back and forth while to you’re driving. Somehow it’s just not as fun.
This problem occurs on many different Hondas including the Civic, Element, CR-V, and others with manual seats and a height adjustment. Honda has a TSB (technical service bulletin) covering the rocking of the drivers seat. I have access to these TSBs through resources at work, but because of copyright issues, I cannot release them on here. A simple google search for TSB 01-057 will give you the part # and procedures for the Civic like I’m working on. Other vehicles are very similar, so this should be pretty comprehensive across the Honda board.
Let’s dig in!
First thing’s first; we have to get the seat out on the bench where we can work on it. There are four bolts securing the seat to the floor and they have little plastic covers over the bolt heads.


Remove the bolts, unplug the electrical connectors under the seat and pull the whole mess out, being careful not to scratch the door pillars with the seat tracks.
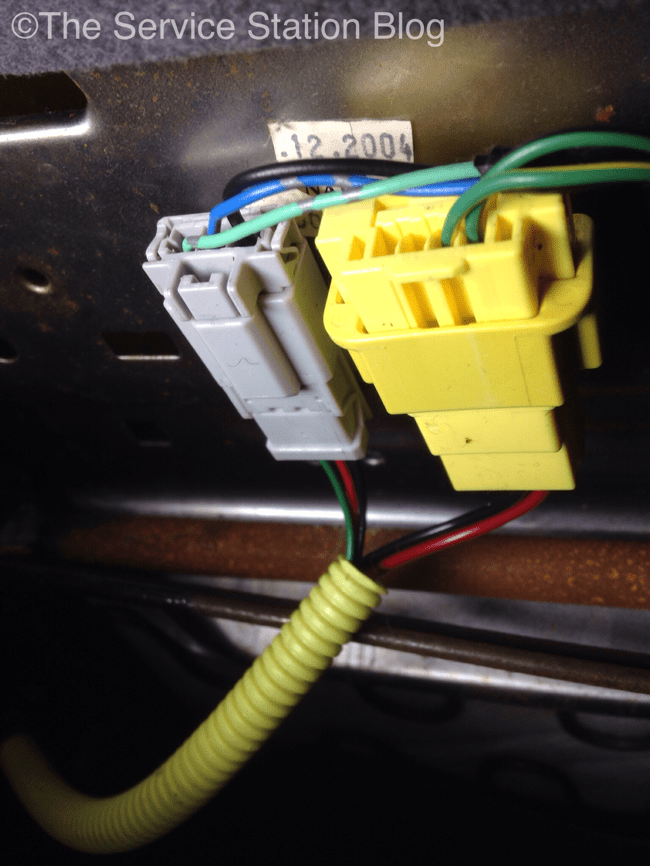


Quick tip on the electrical connectors. The yellow one pushes in as shown and then you pull it apart while the grey (gray?) one has a little tab in the middle you have to push down while pulling it apart. Just a little different than some other connectors you might be familiar with.


You have to pull the plastic cover off the left side of the seat before you can access the seat bushings we’re replacing. First, remove the height adjusting knob by removing the small clip with a pocket screwdriver or similar tool. These little tools are indispensable in the shop! The bottom picture shows how the clip is when it is installed.

Remove any plastic push pins with the appropriate tool as shown and remove the plastic cover.

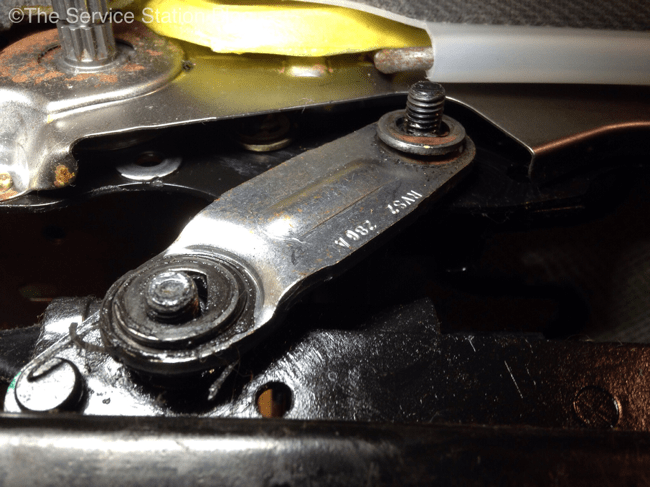
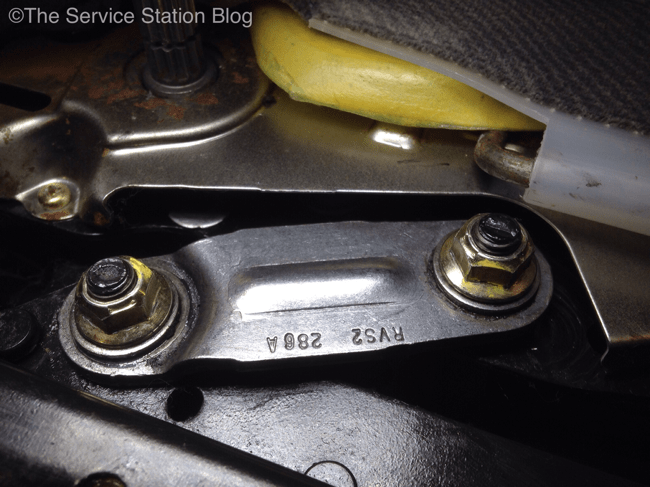
Now, I forgot to remove the recliner handle (arrow), but it just slides right off and makes removing that plastic panel much easier. The bushings are hiding under the three nuts (circled).

The destroyed bushing can be seen here. Be careful when you remove the nuts as there are a couple of other washers and spacers that need to go back where they came from for proper smooth operation. The bushings can be removed with a small screwdriver or a pocket knife.

New bushing next to the old one. These came from the Honda dealer and I don’t really think you can get them anywhere else. Maybe you guys know of another place? They’re not really all that expensive, and there are only 6 of them. The TSB calls to replace the washers and nuts too but I don’t really think that’s completely necessary. This was my first time doing this so I replaced everything as per the TSB but I didn’t the next time I did this on an ’04 Element.

Put the new bushing on the shaft
Be careful when tightening the nuts as the washers are slotted, meaning that they have to fit over flats cut into the shaft. You will damage pretty much everything if you just hit the nuts with an impact and the flats aren’t lined up.

Remember the knob we took off earlier? Before you put it on, make sure you install the clip as shown first, then just slide it on the shaft. The clip will click and you’re done with that side!
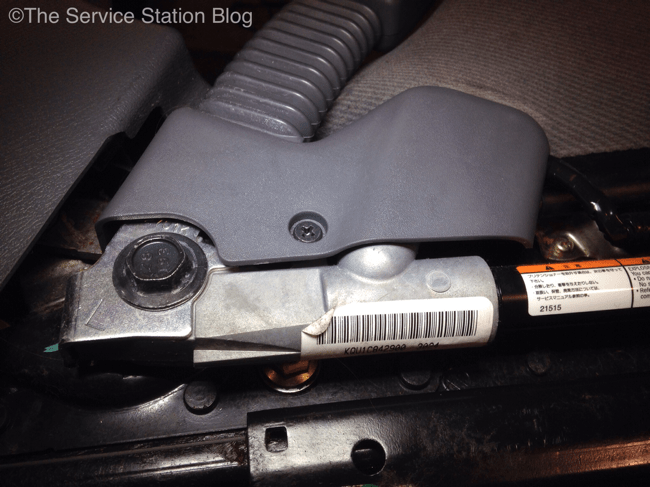
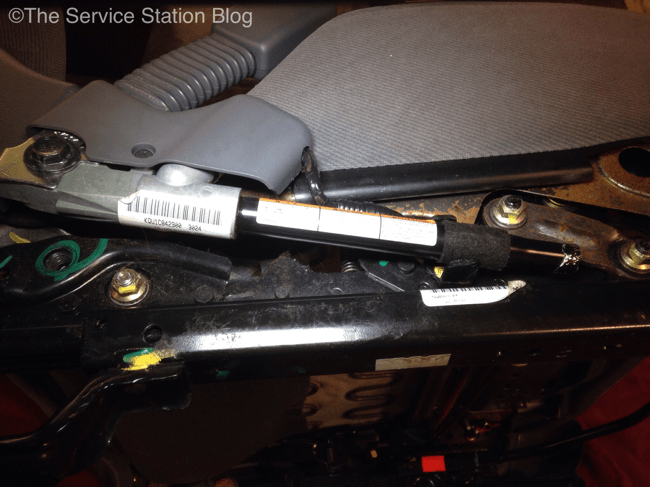
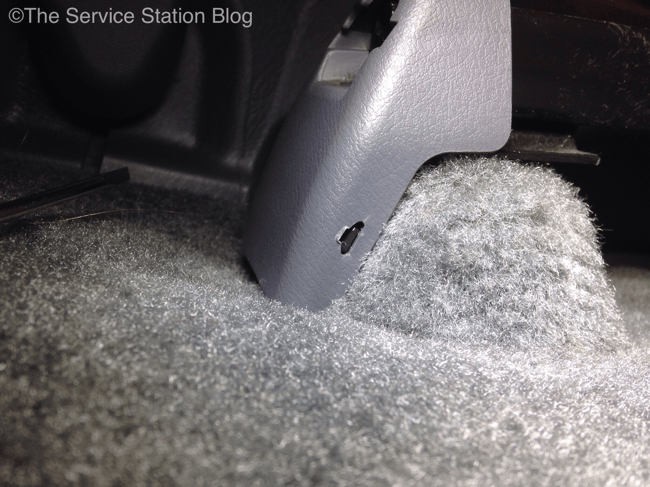
The only thing different about the right side of the seat is the seat belt latch. One bolt can be removed and you can swing it out of your way.
Slap it all back in the car and get ready for a rock solid seat with no rocking! Of course, you can still rock out to 80s hair band music all you want, but the seat won’t rock with you this time. The whole process takes about an hour or so and the parts are probably less than $20 if you get just the bushings and washers, skipping the replacement nuts.
If anyone else has any other tips, let me know!
